|
| "Your scratch disk is full" message |
| Tuesday, October 31, 2006 |

Scratch disks
You are finished work in Adobe Photoshop, and you need to save the file on disk. But trouble came. Message "Your scratch disk is full" showed on screen. You know that you have empty space on disk, but Photoshop won't let you to save the file. Problem is Photoshop have some problems working with disks. But here is easy solution. Make new document 1x1 pixels, and save it on disk in .psd format. That way, Fotoshop will delete older scratch and make new one. This time, very small one, too. Now, Photoshop will see empty space for saving your file.Labels: tips |
posted by acca @ 6:00 AM   |
|
|
|
|
| Make Pop-art from black and white photo |
| Tuesday, October 24, 2006 |
Make Pop-art photo
Open photo in Adobe Photoshop. Pick magic Wand Tool. In this case, first I picked black color background on photo with magic wand tool.
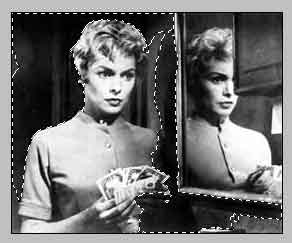
Now, I picked color, and Paint Bucket tool. I filled selected part with color.
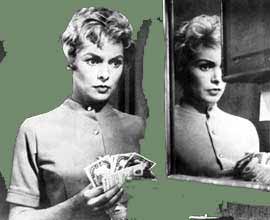
Now, do the same with some other part of photo. And do that with several different parts.
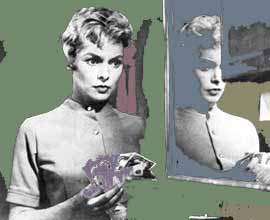
I found the best colors for this Pop-art stuff are some pastel colors, like #728A6D, #6D7B8A, #8A816D, #7E6D8A, ... I used that ones.Labels: tutorial |
posted by acca @ 7:59 AM   |
|
|
|
|
| Adding new font in Photoshop |
| Friday, October 13, 2006 |
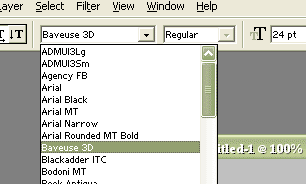
You have found some interesting font on net and you would like to use it in Photoshop. Easy. Download font, copy font in any folder and paste it in C:\WINDOWS\Fonts. If you downloaded font in zipped folder, than you can't do the paste function. Than, paste it in any folder on computer, first. Than, copy that pasted font and paste it in C:\WINDOWS\Fonts.
Open AdobePhotoshop. Pick up "Type tool". Now, in drop-down many you'll see your new font, and you will be able to use it in Photoshop work.
 Labels: tips |
posted by acca @ 3:13 AM   |
|
|
|
|
| Play with Gradient tool |
| Friday, October 06, 2006 |
Some nice effect can be made with Gradient tool in Adobe Photoshop. Open photo. Set foreground color to White. Than, pick Gradient tool (G). On top, on Pull-down menu pick secondary choice - "Foreground to transparent". Now, on photo, click near left edge, pull to right middle and drop. You will see something like this picture:

If you do that in all 4 sides, left, right, up and down, you'll get this:

You can do that with any color you like, just set Foreground color what you need.Labels: tutorial |
posted by acca @ 5:43 AM   |
|
|
|
|
|
|


