Adobe fotoshop - Adobe Photoshop

Adobe fotoshop (photoshop) - downloads, news, expiriences, free, gratis online tutorials for fotoshop (photoshop), tips, tricks, ...

 
How... - Graphic Design
Tutorials on this blog
  • How to make banner 1
  • How to make banner 2
  • How to make banner 3
  • How to make banner 4
  • How to make banner 5
  • Make 3D button in Photoshop
  • Make metal text in Photoshop
  • Transparent ball tutorial 1
  • Transparent ball tutorial 2
  • Transparent ball tutorial 3
  • Transparent ball tutorial 4
  • Restore old photographs
  • Collor filling in Photoshop 1
  • Color filling in Fotoshop 2
  • Magnetic lasso tool
  • Any color on desktop
  • How to crop picture
  • .
    Hosting
    Easy CGI - Reliable and Affordable Web Hosting
    TV capture effect
    Monday, January 29, 2007
    TV capture effect

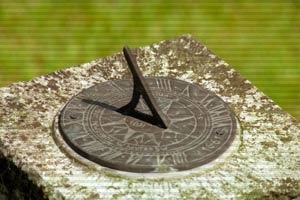
    Do you see this image? You think picture is captured from TV? No, it isn't. That effect is made in Photoshop. And here is how.

    Open Adobefotoshop. Make new document 1x6 pixels with transparent background. Zoom image 1200% (maximum). You can do that easily with CTRL++ combination.
    Chose foreground color for TV lines (black seems nice for it). From Tools palette pick Pencil tool and color top half of image. I did top half, (top 3 pixels) but you can do that with bottom half if you like, never mind.
    Go to Edit – Define Pattern and write «TV lines».
    Now, open photo where you want add TV capture effect. Make new layer. Go to Edit – Fill and from menu pick Pattern – TV lines.
    Set Layer Blending mode to Overlay. Set Opacity to 15. Change Blending mode from Normal to Overlay.
    Double click on that new layer, click on Pattern Overlay and set – Overlay, Opacity 50%, Pattern pick your new one, Scale 100%.
    You should get result like in first picture from this tutorial.

    Labels:

    posted by acca @ 7:02 AM   0 comments

    Create Bar code
    Saturday, January 27, 2007
    Open Adobe Photoshop. Create New document, dimensions 200x100 pixels, on white background. Took «single row marquee tool» and select picture on bottom horizontally, like on this picture.
    single row

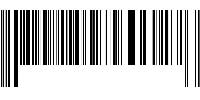
    Go to «Filter -> Noise -> Add Noise» . Chose Amount - 400, and Distribution set to Gaussian . Check Monochromatic checkbox. Now, go to Edit > Free Transform and drag high up to top op picture. Apply the transformation.

    Select bottom middle part of image with rectangular marquee tool and delete selected to make white part.
    white space

    Now, pick up Type tool from Tools palette, and click on left side white part you made. Type several numbers like real bar code have. Select numbers you typed, and change Font size to fit picture and look naturally. Also, pick Move tool and move that layer with numbers some left, right, up or down, if needed.
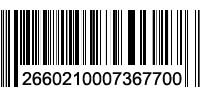
    bar code made in Photoshop

    And there, you made bar code in Photoshop.

    Labels:

    posted by acca @ 12:49 PM   1 comments

    Make white teeth in Photoshop
    Saturday, January 06, 2007
    In this tutorial you can learn how to make white teeth on your photo in AdobePhotoshop.
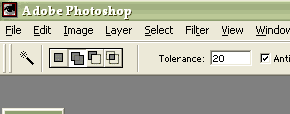
    Open image in Adobefotoshop. Select Magic Wand tool from tools palette. Set Tolerance on 20 and turn on "Add to selection" like on image.

    Magic wand setings

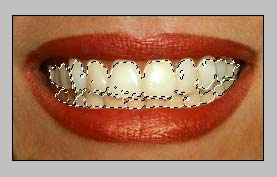
    Now, with Magic Wand, select teeth. You can click several times to select all teeth and their parts you want to make white.

    yellow teeth

    When you selected all parts, go to "Image -> Adjustments -> Hue/ Saturation". Set up follows:
    Edit Yellows
    Hue 0
    Saturation -100
    Lightness +50.

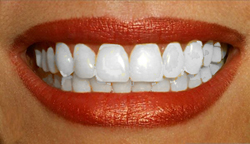
    Go to OK and you're done. If you see some yellow teeth parts after, just do the same process again on that parts need improve.

    white teeth in photoshop

    Labels:

    posted by acca @ 1:37 PM   2 comments

    Google search
    Google
    Previous Post
    Adobe official
    Archives
    Recommended on FB
    Links
    Powered by

    BLOGGER


    eXTReMe Tracker
    Blog Announce


    About Me
    Name: acca
    Home: Serbia
    About Me: Life can be beautiful if you decide to.
    See my complete profile
    © 2016 Adobe fotoshop - Adobe Photoshop .Template by Isnaini Dot Com ........... Adobe official site
    Site is optimized for FireFox ...
    privacy: