Open AdobePhotoshop. Open New document, 150x200 pixels with white background.
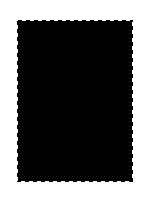
Create a new layer, pick Rectangular Marquee Tool, mark and paint selection in black. Just like on this image.

Deselect. Go to FILTER - BRUSHED STROKES - SPRAYED STROKES , and set:
Stroke Length to 10
Spray Radius to 15
Stroke Direction - Horizontal.
In Tools, pick "Magic Wand" and click inside black rectangular. Now, invert selection and click Delete. Deselect.

Go again from "FILTER - BRUSHED STROKES - SPRAYED STROKES" part but instead Stroke Direction Horizontal pick "Right Diagonal". Play with sliders a little to make nice effect.
CTRL + click on layer and pick Red:240, Green:225, Blue:205 color. Paint black rectangular.

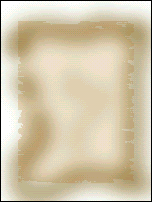
Make new layer. In brush, pick Soft brush 45. Opacity to 20%. Mix Red:116, Green:74, Blue:0 color and paint edges.
CTRL Click on rectangular layer to load selection, invert it and delete.
Link layers and merge linked.
Go to FILTER - EFFECTS - Outer Glow. Mode - normal.
Opacity - 75%.
Blur - 1 pixels.
Intensity - 50%.
Now, go to FILTER - EFFECTS - Drop Shadow.
Mode - multiply.
Opacity - 50%.
Angle 135
Distance 7 pixels.
Blur 6.
Intensity 0%.
Now go to IMAGE - ADJUST - Brightness/Contrast, and add picture or text.

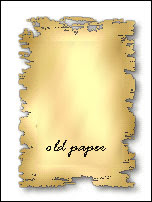
You just made old paper in Photoshop for your usage.
Somewhere a step is missing. I've followed this tutorial over and over again and somewhere between the second time going to filter>brush stroke and the end, there is a mistake or typo. Something is amiss. Could you go back over this again and edit? This is the only paper tutorial I have been able to find.
ReplyDeleteI think there is a step missing somewhere in here. Could you go back over and edit? I've followed the steps twice and still end up with a blackish-blue paper in the end after I invert.
ReplyDeleteThere is something missing. The step after the filter does not make much sense. open filter window you cannot touch the tools until filter is applied. if you apply the filer and select magic wand you will end up selecting the entire black box.I like the effect but the tutorial ... no offense seemed rushed and therefore is bad
ReplyDeleteHi, it worked for me this way:
ReplyDelete- After create the black square, click on it with the magic wand to select it (or Ctrl-Click in the black square layer).
- Then create a mask for the square.
- Now you can apply the brush stroke filter to the mask.
It can be done by different methods, but the trick is in the mask.
The effects looks better if you use a 300x400px image size.
www.hectorsportfolio.com